This is a highly figured Koa Rosette inlaid in to an LS Redwood Top. It is for Paul Fs OMFS. We were going to do another outside ring, similar to the 0-12 rosette but decided it looked great with out. Anyways, same process as the coco rosette detailed below. One element of my guitars that I always strive for is the "understated" In doing this I try to keep the feature of the rosette, in this case its the Koa center, under .200 wide. Any thicker and it starts to look fat in my opinion.
Wednesday, November 29, 2006
More Rosettes!
Another rosette just completed.
This is a highly figured Koa Rosette inlaid in to an LS Redwood Top. It is for Paul Fs OMFS. We were going to do another outside ring, similar to the 0-12 rosette but decided it looked great with out. Anyways, same process as the coco rosette detailed below. One element of my guitars that I always strive for is the "understated" In doing this I try to keep the feature of the rosette, in this case its the Koa center, under .200 wide. Any thicker and it starts to look fat in my opinion.


This is a highly figured Koa Rosette inlaid in to an LS Redwood Top. It is for Paul Fs OMFS. We were going to do another outside ring, similar to the 0-12 rosette but decided it looked great with out. Anyways, same process as the coco rosette detailed below. One element of my guitars that I always strive for is the "understated" In doing this I try to keep the feature of the rosette, in this case its the Koa center, under .200 wide. Any thicker and it starts to look fat in my opinion.
Detour -- Right -- for redwood :)
If you've been following the building notes of the 0-12 you know that I wanted to put
a nice Italian top on it. I have since changed my mind, After all its my guitar so I can do that :-)
With my propensity toward redwood, I pulled a real nice set of "Carter TB Redwood" from the wood shelve and went to work. This guitar will be completely adorned with Brazilian rosewood appointments. I selected a nice chocolate brown piece for the rosette as well as the pyramid bridge. Below are a few pictures that show how its coming. Thanks as always for looking!
Tuesday, November 21, 2006
Making a rosette..
This weekend I installed a book matched Cocobolo rosette in to the Italian top for the O-12.
Here is how I did it :)
First process is to measure and cut the wood ring.

Here the ring has been cut out of the rosette blank, which was made from off cuts from the back.

Next I route a channel to inlay the cocobolo ring into. After routing the channel is sealed with shellac to prevent the coco from leaching into the open end grain of the top.

Next I test fit the ring. Just right, leaving enough room for the purflings.

Here the channel has been cut, the ring fit, and now I am dry fitting the b/w/b purfling strips.

After everything has been fit I flood the rosette with CA, or cyanoacrylic glue, better know as Super Glue :)


Next the rosette is run under the thickness sander to level it with the top, and here it is completed.

Thanks for looking!
Here is how I did it :)
First process is to measure and cut the wood ring.
Here the ring has been cut out of the rosette blank, which was made from off cuts from the back.
Next I route a channel to inlay the cocobolo ring into. After routing the channel is sealed with shellac to prevent the coco from leaching into the open end grain of the top.
Next I test fit the ring. Just right, leaving enough room for the purflings.
Here the channel has been cut, the ring fit, and now I am dry fitting the b/w/b purfling strips.
After everything has been fit I flood the rosette with CA, or cyanoacrylic glue, better know as Super Glue :)
Next the rosette is run under the thickness sander to level it with the top, and here it is completed.
Thanks for looking!
Thursday, November 16, 2006
Thursday, November 09, 2006
ITS HERE!
Tuesday, November 07, 2006
More on shaping back braces.
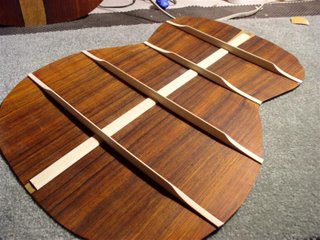
In this pictorial I will show how I shape the back braces for my acoustic guitars. This example is once again Mike Crixell's LS Redwood/Flamed Koa OMFS. In this image I have taped a steel ruler over the center reinforcement strip as to not damage it as I slide the plane along the length of the brace. I start by marking the center of the brace with a pencil, then holding the plane at an angle I shave the edge of the brace until I reach the center mark. Then I do the opposite side the same way.
Here you can see the bottom of the plane and the triangular profile of the brace after its been shaped.
Here the braces have all been shape, and the ends scalloped. All that is left is some fine sanding and the back is complete
Below are a few more images of Mikes Guitar and The Little Italian Cocobolo.
Monday, November 06, 2006
Mike Crixells back, braced and ready for shaping.
Here is a little sequence of pictures that show how I brace a back. The first image shows
the center reinforcement strip being cut to accept a brace.


Here I am testing fitting a brace -- Perfect :)
 Now all the braces are glued in place and clamped using the go-bar deck.

Finally after about 25 minutes I clean up the squeezout. The back will stay in the go-bar deck until the next day. It could come out as soon as 1 hour, but since I don't have to hurry it I will leave it until tomorrow.
Thanks for looking!
the center reinforcement strip being cut to accept a brace.
Here I am testing fitting a brace -- Perfect :)
Finally after about 25 minutes I clean up the squeezout. The back will stay in the go-bar deck until the next day. It could come out as soon as 1 hour, but since I don't have to hurry it I will leave it until tomorrow.
Thanks for looking!
Thursday, November 02, 2006
My Paradise
Tooling up!

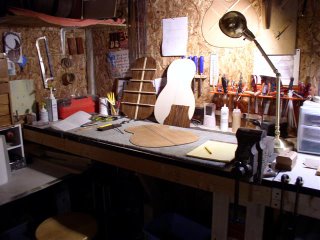
Ready to make sawdust! The two new Dust making machines, a Grizzly edge sander and a Grizzly spindle sander are now powered up and tied in to the dust collection system. Some would say that these machines are " rotator cuff savers" as they help immensely in some of the very repetitive sanding motions that are involved in guitar making.
Heavenly Koa!
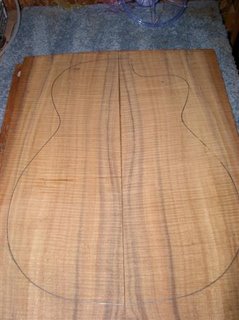
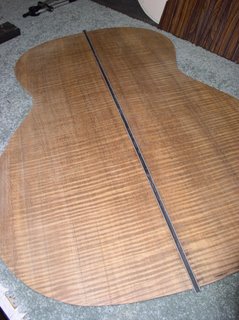
Mike Crixells Koa back
Subscribe to:
Comments (Atom)


